A screenshot is an image taken of the entire Chromebook screen or just a part of it. It’s an easy and efficient way to capture anything that appears on your device, such as web pages, messages, documents, images and more.
Taking screenshot on a school Chromebook is straight forward. With just a few keyboard shortcuts, you can take full-page screenshots and even crop portions of the screenshot for more clarity.
In this article, I will show you five ways to crop a screenshot on Chromebook, along with useful tips so that you can make the most of your screen captures.
5 effective ways to crop screenshot on Chromebook
To crop screeenshot on a Chromebook, you can apply different methods like using keyboard shortcuts, using trackpad, using drag & drop or third-party apps.
Here is the detail of each method. Go through them and let us know which one works for you.
1. Using the Trackpad:
This is one of the easiest and most convenient ways to crop a screenshot on Chromebook.
All you need to do is press “Ctrl” + “Shift” + “Window Switcher” buttons simultaneously, then use two fingers on the trackpad to select the area or region you want to capture.
Once you’ve selected your desired area, simply release your finger from the trackpad and the image will be automatically cropped and saved in your Downloads folder.
2. Using Drag & Drop:
Another great way to quickly crop screenshots on Chromebook is by using drag-and-drop method.
To do this, simply press “Ctrl” + “Shift” + “Window Switcher” buttons simultaneously and drag your mouse cursor around the area you want to capture.
3. Using Keyboard Shortcuts:
If you prefer using keyboard shortcuts instead of using a trackpad or dragging & dropping, here are some steps for cropping a screenshot on Chromebook with keyboard shortcuts:

First press “Ctrl” + “Shift” + “F5” buttons simultaneously to open the screenshot tool.
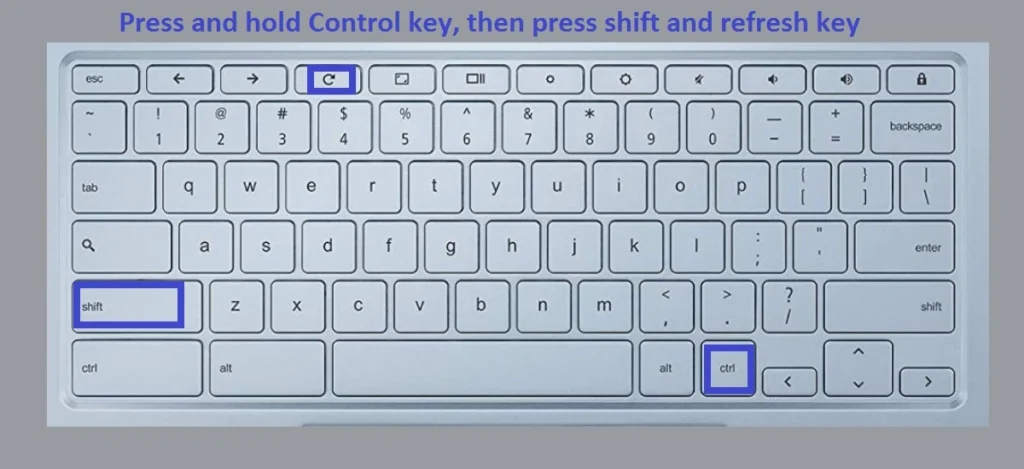
Then select your desired region of the screen by pressing arrows keys on your keyboard (up/down/left/right) and finally press the “Enter” button to confirm your selection.
The image will then be automatically cropped and saved in your Downloads folder.
4. Cropping with Annotation Tools:
If you need more control over cropping a screenshot on Chromebook, you can also utilize annotation tools available in Chrome OS.
To crop the image, simply click the edit icon (looks like a pencil) located at the top-right corner of the overlay and select ‘Crop’ from the options that appear.
Then drag & drop or use arrow keys to select your desired area and click ‘Crop’ again when you’re done.
5. Using Third-Party Apps:
Lastly, if you need more advanced cropping features, you can use a third-party app such as Lightshot or Nimbus Screenshot & Screen Video Recorder.
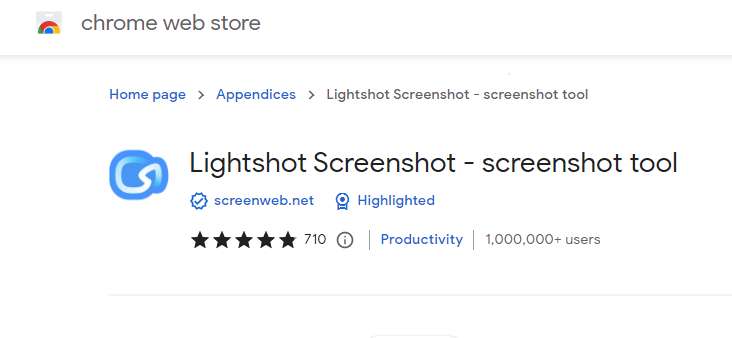
These apps are available in the Chrome Web Store and they offer a wide range of features including cropping, annotation, drawing tools and more.
General tips for cropping a screenshot on Chromebook
Now that you know how to take full-page screenshots and crop portions of them on your Chromebook, here are some useful tips to help you make the most of these features:
1- Use the Right Keyboard Shortcuts:
Remember that taking a full-page screenshot is done with Ctrl + Show windows key (also known as F5 or Search), and cropping can be done quickly by pressing Ctrl + E.
2- Adjusting Image Quality and Size:
When saving a cropped image, you can adjust its resolution and size as well. This will come in handy when sharing screenshots online since it saves a lot of time from not having to resize them manually afterwards.
3- Using Advanced Editing Tools:
If you want to do more than just crop portions of your screenshots, there are several advanced editing tools available. These allow you to draw, add text or even apply filters to your images so that they can be shared more easily.
Sharing Screenshot on your Chromebook:
Now that you have learned how to crop screenshots on your Chromebook, it is time to share them with others. You can easily do this by using the built-in sharing feature of Chrome OS.
All you need to do is open the file browser and locate the screenshot that you want to share. Then, right-click on it and select “Share” from the menu.
You will now be able to share your screenshot in two different ways: you can either copy and paste it into another application, or you can share it directly with someone else using their email address or a link to Google Drive.
Advantages:

1. Easy to edit: Cropping a screenshot on Chromebook is simple and easy to do, allowing users to quickly edit their screenshots with precision.
2. Increase productivity: When cropping a screenshot, you can easily identify the necessary details in the image that will help you complete tasks faster. This helps increase productivity by ensuring that you only take the necessary parts of the screenshot, and not the extra details.
3. Save time: Cropping a screenshot on Chromebook will save time as you won’t need to manually search for different sections of an image. With cropping, it’s just a few clicks away and can be done in seconds.
4. Better organization: By cropping screenshots on Chromebook, you can organize your images quickly and easily without having to sort through unnecessary clutter. This ensures that all of your information is organized in one place and ready to use when needed.
5. Enhanced visuals: A cropped screenshot enhances the overall visual look of an image since it eliminates any unneeded portions of an image.
Dis-advantages:

1. Loss of information: When cropping a screenshot, some portions of the image are lost which can cause important details to be missed out on.
2. Not suitable for large images: Cropping screenshots on Chromebook may not be ideal for larger images as the process can become time-consuming and tedious. It’s best to use an alternative software program when editing larger size screenshots.
3. Limited features: The built-in tools used to crop screenshots on Chromebook may have limited features, making it difficult to make precise edits or adjustments. Additionally, you may need to install additional programs in order to access more advanced cropping settings or effects such as filters or color adjustments.
4. Possibility of errors: There is always a possibility of making mistakes when cropping screenshots on Chromebook, which could result in undesirable results or the loss of important parts of an image. It’s important to double-check your work before saving any changes.
Conclusion
Taking and cropping screenshots on Chromebooks is a fast and easy way to capture anything that appears on your screen without having to take multiple photos or print them out.
With just a few keyboard shortcuts and the right settings, you can quickly save full-page screenshots and crop portions of them as well. These tips will help make sure that your screen captures are clear and accurate, no matter what you’re trying to capture.
Frequently Asked Questions
Is there a snipping tool for Chromebook?
Yes, you can use the built-in Image Editor to crop screenshots on your Chromebook. All you need to do is right-click on the screenshot and choose “Open With” then select “Image Editor.” You can also press Ctrl + E on your keyboard to open it quickly.
Can I share a screenshot from my Chromebook?
Yes, you can easily share screenshots from your Chromebook by using the built-in sharing feature. All you have to do is right click on the screenshot and select “Share” then choose how you would like to share it (e.g., email or Google Drive link).
How do I adjust image size and quality?
When saving a cropped image, you can adjust its resolution and size as well. This will come in handy when sharing screenshots online since it saves a lot of time from not having to resize them manually afterwards.
To do this, simply click on the “Save As” button and select the resolution and size you would like to use before saving.
Can I draw or add text to my screenshots?
Yes, there are several advanced editing tools available that will allow you to draw and add text to your screenshots. However, these require a bit more skill and knowledge of the editing tools than just cropping images.
If you would like to learn how to use them, there are many tutorials available online that can help you get started.
Which F button takes a screenshot?
On most Chromebooks, you can use the F5 key to take a screenshot. On other models, you may need to press the “Ctrl” + “Shift” + “Window Switcher” keys simultaneously. You can find out which combination works on your device by looking up its manual or searching online.
What does Ctrl Shift L do on Chromebook?
Pressing Ctrl + Shift + L on a Chromebook will lock the screen. This is an important security feature and should be used whenever you walk away from your device, even if it’s just for a few minutes.
Where is the crop button on a Chromebook?
Once you’ve taken your screenshot, the crop button will appear at the top of the screen. It looks like a pair of scissors and can be used to select an area of the screenshot that you want to keep while discarding the rest.
How do I save my cropped screenshot?
Once you’ve selected your desired area, click “Done” at the bottom right corner of the window. This will save the selection and automatically open up a window with options for how to share or export it.
You can choose from a range of methods including saving it as an image file (JPEG/PNG) or uploading it directly to Google Drive or other cloud storage services.